naive blog
在macOS10.14上使用GDB教程
这个标题看起来非常拗口,我们来分析一下,我们要设计的应用需要满足:
- 登录自启动
- 在菜单栏上有图标
- 后台应用
- 非沙盒
最后一条是由于大部分的macOS应用都没有必要上到AppStore上去,所以非沙盒设计也简单一些。而满足前三条的应用实际上非常常见,如大家誉为神器的Alfred等。我之前设计过一个在Mac上的统计屏幕使用时间的软件 MyAppTime , 就满足了这四个条件。实际使用截图如下:
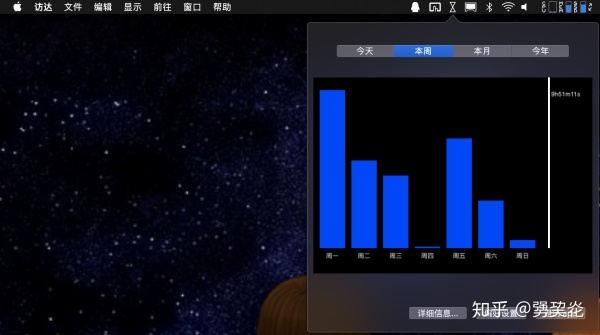
现在网络上(无论是中文网站还是外国网站)大多都是基于沙盒化的应用介绍的,需要额外的Helper等辅助应用,比较麻烦。而我介绍的这种方法似乎并没有人介绍过。下面,分别介绍一下在非沙盒化情况下,前三点是如何完成的:
登录自启动
首先,新建一个plist文件,建议取名按逆域名命名,如
com.developer.applicationLauncher.plist
, 其中要加入以下条目:
<?xml version="1.0" encoding="UTF-8"?>
<!DOCTYPE plist PUBLIC "-//Apple//DTD PLIST 1.0//EN" "http://www.apple.com/DTDs/PropertyList-1.0.dtd">
<plist version="1.0">
<dict>
	<key>Label</key>
	<string>com.developer.applicationLauncher</string>
	<key>ProgramArguments</key>
	<array>
		<string>/Applications/xxx.app/Contents/MacOS/xxx</string>
	</array>
	<key>RunAtLoad</key>
	<true/>
</dict>
</plist>
其中的
xxx
就是我们要设计的应用的名字。
然后,将这个plist文件移动至
~/Library/LaunchAgents
文件夹即可。
在菜单栏上有图标
首先,在
Assets.xcassets
文件夹内加入一个new Image Set, 然后向里面添加一个图片作为菜单栏的图标。这里建议图片为PDF格式,且仅有黑色和白色两种颜色。然后在AppDelegate中加入如下代码即可。
NSStatusBar *statusBar = [NSStatusBar systemStatusBar];
NSStatusItem *statusItem = [statusBar statusItemWithLength:NSVariableStatusItemLength];
NSImage *statusItemImage = [NSImage imageNamed:@"statusItemImage"];
statusItemImage.size = NSMakeSize(18.0, 18.0);
statusItemImage.template = YES;
statusItem.button.image = statusItemImage;
statusItem.button.target = self;
statusItem.button.action = @selector(handleStatusItem);
后台应用
在
info.plist
中加入一条:Application is agent(UIElement), 并将其设置为Boolean值YES即可。
